Sunday, 1 July 2012

French toast with poached pears, maple syrup and roasted hazelnuts

Yesterday morning, I made myself french toast for breakfast. Lord knows that after the week of bad eating I've had (and by bad, I mean good, but unhealthy), I didn't need it, but I just had to have it. I just had to.

Anyway, you need no recipe for french toast, just a bit of common sense. If you like it sweet like me, add a tablespoon of sugar to a couple of eggs and some cream or milk. Then get your bread - I used some stale apple and cinnamon raisin toast, but you could use anything- and soak it really well. I mean really well- give it plenty of time to absorb what is essentially an uncooked custard. Don't attempt to do more than one slice of bread per egg. If you do, you'll find your french toast will be dry on the inside. What you want is a beautifully soft, custardy interior with a crisp outer shell. Also, cook it at a low heat. My pan got a bit too hot and  my french toast ended up rather dark. It was still delicious, but it would have looked much nicer had it been golden brown.


You can serve french toast however you like. Some like it savoury, in which case, omit the sugar and add a good pinch of salt at the start, plus more to serve. Here I have added some poached pears, which I heated in the pan after cooking the toast, a good slug of maple syrup and a scattering of delicious roasted hazelnuts,  that I blitzed in a food processor. Why not give french toast a try for a perfect lazy Sunday breakfast? It's quick, easy and every bit as delicious as pancakes.

Thursday, 28 June 2012

Gâteau aux noisettes et caramel


Ok, ok, I totally just made this name up. It was certainly not given this name in the cookbook, but rather a ridiculous name, 'Entremet Contemporain', that utterly fails to convey what kind of a cake this is. I could more simply have called it a hazelnut and caramel cake, but when one has a french inspired luncheon, one MUST give things french names. On Sunday I had a little, belated Birthday luncheon with a couple of friends and I made this cake, among other things, for my guests. In an ideal world, I would have taken photos of the twice baked Gruyère soufflé that I made for entrée, as well as the Fillet de Boeuf en Croûte we had pour le Plat Principal. Sadly, I was too busy running back and forth between the kitchen and the dining room to remember to take any photos of these at all.


So it is that you will have to be satisfied with the photos that I did take: those of the Gâteau aux noisettes et caramel. The cake is surrounded by a ring of sponge and its interior consists of a layer of caramel syrup soaked sponge, then caramel mousse, another layer of soaked sponge, hazelnut cream and finally a caramel glaze.


I'm not going to lie to you and pretend that it was all smooth sailing- no siree! The recipe in question comes from the Cordon Bleu book of desserts. The recipe is a bit of a shambles really. It seems that Cordon Bleu didn't correctly augment quantities for the home baker, leaving some components of the cake in quantities vast enough to produce 3 or 4 cakes, while other components were converted accurately and produced only enough mixture for one. 


Luckily, I'd seen enough recipes in my time to know that the specified quantities were wrong and altered the size of the batches accordingly. This entailed halving the cake mix, halving the caramel sauce, making the full batch of mousse, a half batch of cream and a full batch of glaze- CRAZY! 


Not only that, but there was a major error in the ingredients list for the mousse. The recipe specified 40g Gelatine, which seemed an insane amount, but I didn't question it for long enough to check the packet for directions. What I ended up with was a horrible, caramel glue that I could hardly remove from the saucepan, let alone fold into cream. A second batch turned out just right with about 2/3 sachet (roughly 1 1/2 tsps of gelatine). Boy did they get that quantity wrong!


Anyway, I shouldn't complain too much. Despite all these issues, the cake turned out rather well and cut beautifully. The highlight for me was definitely the hazelnut cream, which was, coincidentally, the simplest of all the components to make. It is seriously just cream whipped with a bit of icing sugar and some blitzed up roasted hazelnuts folded gently through. 


If you are brave enough to tackle this beautiful gateau after my horror story, just let me know and I will happily post the amended recipe on the blog. 


Bon appetit!


Wednesday, 6 June 2012

Marvelous Marshmallows


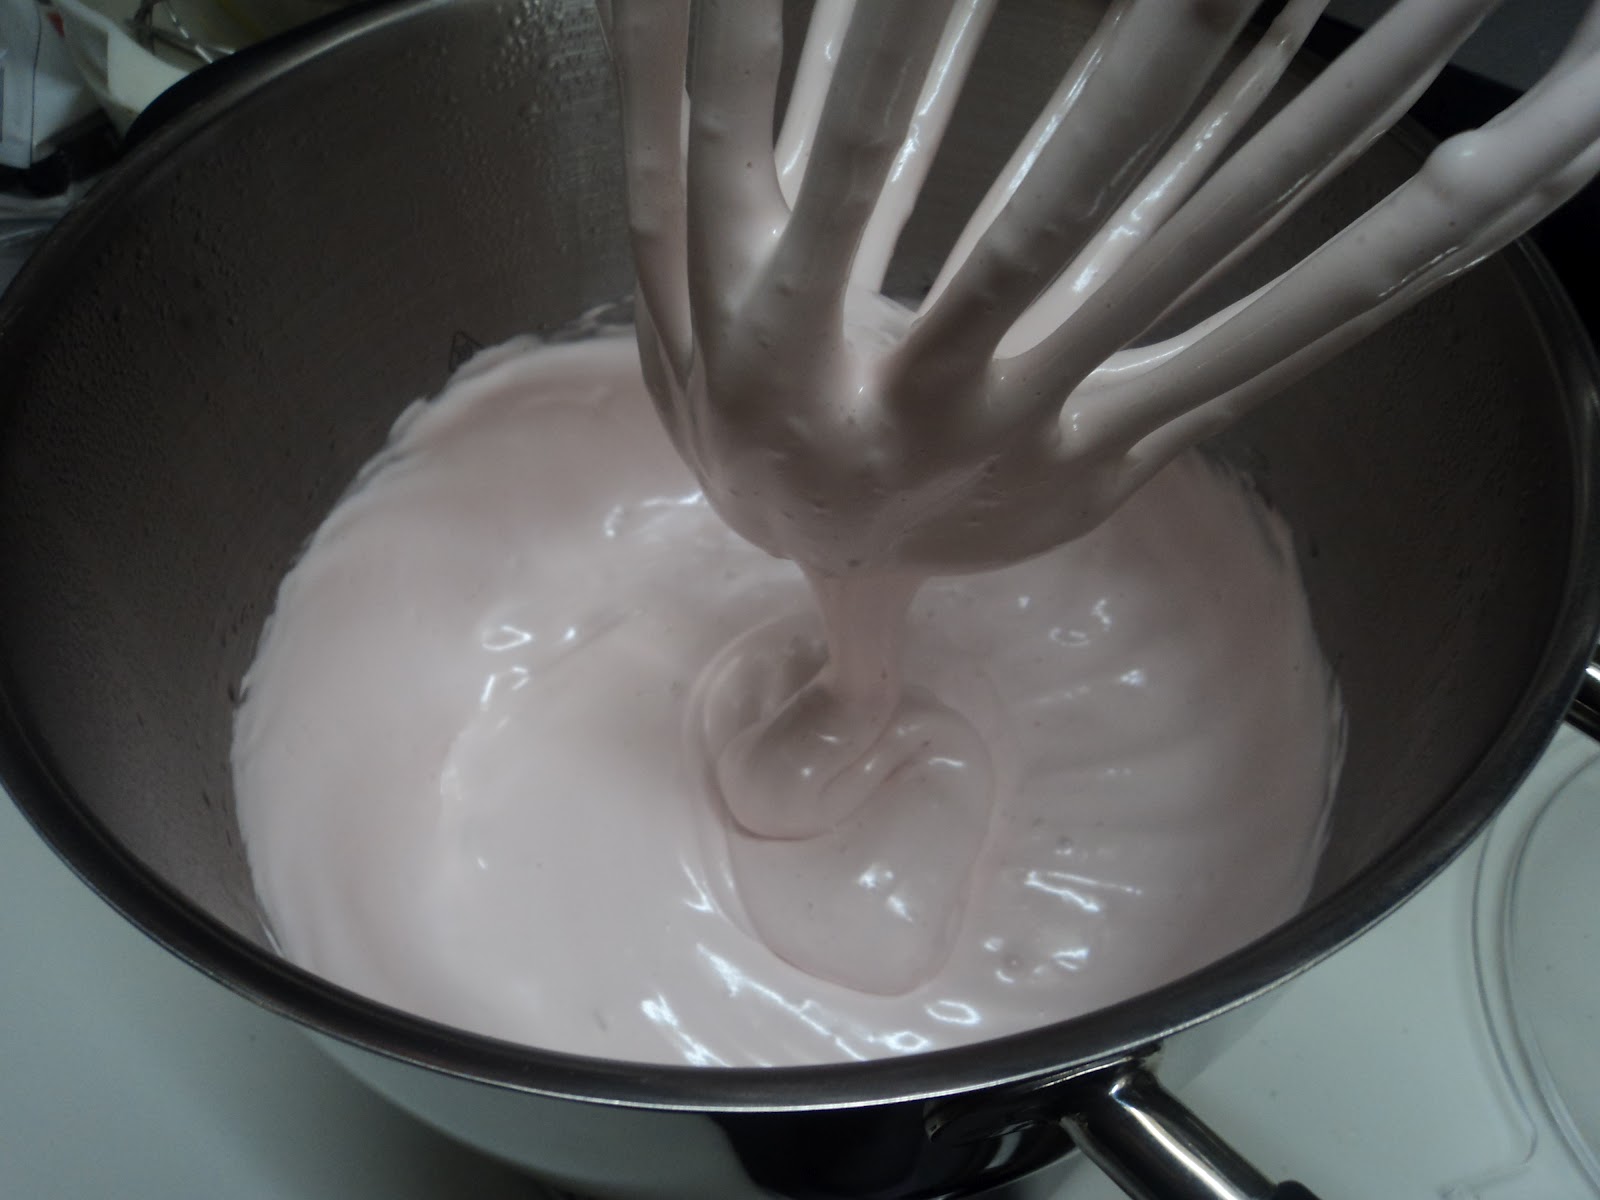
Hands up all those who have eaten home made marshmallows? Who has ever contemplating making them? It would seem to many to be a ludicrous idea, but they are in fact relatively easy ......... provided you have a stand mixer. If you don't, well, maybe it might be a little tricky. If you do, you are in for a real treat. My gosh they are good! Like unbelievably, positively, absolutely fantastic!!! They really do put your store bought marshmallows to shame.


A few weeks ago I was watching Hugh Fearnley-Whittingstall make his own Marshmallows on the River Cottage: Autumn. I was struck immediately by how quick they were to whip up and, even more amazingly, how rapidly they set. I really thought marshmallow would have to set over night, or for the equivalent amount of time. Of course, Hugh, being the good, all natural, back to basics kind of a guy that he is, used Beetroot to colour the marshmallows pink. I didn't have any beetroot on hand, nor did I have the slightest inclination to use a vegetable to colour my food. As far as I'm concerned, a drop of food colouring won't hurt at all. 


The recipe is available here from the BBC site. I urge you all to give them a go. If like me, you are short of beetroot, just put in a few drops of pink colouring into the 125 mls of boiling water before adding the gelatine. You won't believe how far your two egg whites willgo- you will end up with a huge batch of the lightest, most delicious Marshmallows you've ever tasted: perfect with hot chocolate or toasted over a fire. Enjoy!

Sunday, 27 May 2012

Haupia cake


I have been fortunate enough to have spent quite a bit of time in Hawaii over the years and on one of my more recent visits, I was introduced to a delightful Hawaiian specialty- the Haupia cake. Haupia is a cold, jelly like coconut pudding, and this, the cake version, is a layered dessert of meltingly tender sponge and fantastically wobbly Haupia. My first taste of this cake was during a girl's trip to Honolulu with my mother and sister, Rachael. Rach took a particular fancy to this coconut creation and insisted upon ordering it at every establishment with Haupia cake gracing its dessert menu.


On the occasion of Rachael's Birthday, this past week, I was stuck for ideas on which cake to make her, when I suddenly remembered her fondness for the Haupia cake. I went searching online and came across a recipe by renowned Hawaiian chef, Roy Yamaguchi of Roy's Restaurant. I'm generally not too keen sourcing recipes online without knowing the reputation of the author. I felt assured, though, in this case, that the recipe would be a good one, because I have heard nothing but positive reviews of Roy's Restaurant. You may even recall an episode of the Family Jewels, in which Gene takes his wife, whoops, I mean girlfriend, to Roy's; they liked the food so much that he went and chased down Roy to make a private dinner for the two of them the following evening.


The recipe, as expected, worked a treat. It is really one of the most interesting cakes you'll ever have. I would say, in terms of texture, that it is more like a trifle than a cake, with its lovely mellow coconut jelly and moist sponge. By the way, if you've never before seen candles in jelly, it is a sight to behold. My how they jiggled about as I carried the cake to the table! The most important thing of all was that Rach was thrilled with her birthday cake, which was, after all, the whole purpose of its being made.

Thursday, 24 May 2012

Cinnamon Buns for Mumsy Daisy


Cinnamon buns are a true favourite of my mother's. She is not the kind of person with a really sweet tooth, in fact she rarely orders desserts. Cinnamon buns, however, she can devour by the dozen. I decided to make her a batch for mother's day and, to shake things up a bit, I added some mashed bananas to half of these lusciously sticky, oozy, gooey buns. I'm not going to lie to you, I too adore these buns. It is hard to convey in words and pictures just how moreish they are, not least because, as the italians would say, they are brutti, ma buoni (ugly, but good). To fully comprehend, one must encounter the buns when they are fresh from the oven, their heavenly spiced scent permeating through the corridors and into every  nook and cranny of the house, and their sticky cinnamon centres oozing from each and every crevice of these wonderful buns. Because the word 'enough' doesn't exist in my vocabulary, I top it off with a cream cheese drizzle for good measure.


The recipe I use is based on Nigella's 'Norwegian cinnamon buns' from How to Be a Domestic Goddess, a wonderful book that I can't recommend highly enough. It has been a long time since I made these following the recipe to a tee, having tinkered with them substantially over the years to create my own recipe. I'm not yet ready to share mine, I'm afraid; cinnamon buns are, you see, one of MY things. I wouldn't want anyone to take over now, would I? Maybe one day when I'm feeling more generous and not too lazy to type it up, I may consider sharing with you, my privy counsel. Until that day, try Nigella's recipe and play around- you may come up with something even better. 

Wednesday, 16 May 2012

Banana nut muffins


In Honolulu, there's a fabulous little place that sells my favourite muffins in the whole wide world. It is a small, unassuming takeaway joint in the Ala Moana food court called 'The Paradise cafe' and its muffins are out of this world. The banana nut muffin is my particular favourite: a golden, crunchy muffin top with a fragrant, moist and oaty interior. Ever since I first tasted it, some 6 or so years ago, I have made it one of my life's greatest ambitions to replicate the magnificent banana nut muffin of 'The Paradise Cafe'.


This muffin was the closest I've ever come to the perfection of 'The Paradise cafe': close, but not quite. I'm seriously contemplating just asking for the recipe next time I'm in Hawaii just to get me through to the next visit. Honestly- I'm sick of these dry, cakey things that vendors are calling muffins these days. I'm also equally unimpressed by homemade muffins sans crunchy top- don't be afraid, people, to fill 'em up right to the top, even a little over, to get a wonderfully crunchy muffin top.

Ingredients


200g Wholemeal spelt flour (my preference, but you can use ordinary plain flour too)
100g rolled oats, coarsely ground, or oat bran
2 tsp Baking powder
2 tsp Cinnamon
125g Brown sugar + 2 tablespoons for the topping
2 eggs
1/2 cup maple syrup
80ml natural yoghurt
100ml vegetable/canola oil
4 bananas, mashed
50g macadamias, coarsely chopped

Method


Preheat oven to 200 degrees celcius.

In a large bowl, stir together all the dry ingredients, except for the macadamias and reserved additional sugar for topping. Make a well in the centre. In a smaller bowl, whisk together the wet ingredients until amalgamated. Pour this into the well in the centre of the dry ingredients. Mix gently a few times, just enough to mix the wet into the dry so that there are no huge patches of flour remaining. DO NOT STIR MORE THAN THIS. A light muffin is made from a lumpy batter, so don't be tempted to whisk or you'll end up with dense muffins.

Place muffin papers into a 12 muffin pan. Delicately scoop the muffin batter all the way to the top in the awaiting muffin papers. If it looks as though you won't have enough batter for 12, though you should, it is better to have fewer muffins filled up properly. In a little bowl, mix together the reserved sugar and macadamias. Sprinkle evenly over the top of the muffins.

Place tray in preheated oven and bake for 20-25 minutes. I know it seems a long time for a muffin, but these are rather large. Still, be sure to check yours after 15 minutes and then at five minute increments- ovens vary enormously in temperature.

Once manageable, remove muffins from pan and leave on a cooling rack. They will keep for several days in an airtight container, although I warn you that they are never as good on days 2 or 3. The muffins are so moist, you see, that putting them into a container rather destroys the wonderful crunchiness of their tops. If you have time, put the day old muffins back into the oven for 5 minutes or so to revive their texture.

Monday, 14 May 2012

White vienna loaf

 Enjoying a freshly baked loaf of bread is one of the simplest and greatest pleasures of life. Indeed there is nothing remotely exotic about a loaf of plain white bread, nor is there any great challenge in its preparation; there is, nonetheless, a certain pride that can be attained only from baking with yeast. A cake comes to life only when it is consumed by the heat of the oven. Bread, on the other hand, comes to life before your very eyes on the kitchen bench. The dough, nurtured by the gentle touch of your hands and guarded carefully by your watchful eyes, miraculously grows, doubling in volume. It is the closest thing, I can only imagine, to raising a child; the only difference being that we tend not to eat our children once they are grown. 


This recipe is 'The essential white loaf' from Nigella Lawson's How to be a domestic goddess. Nigella suggests using potato water for its excellent starchy properties. I, however, didn't have any potato water on hand, so I substituted some similarly starchy pasta water and reduced the quantity of salt to 2 teaspoons. It has a lovely crumb and the ratios seemed to be spot on.


One thing Nigella doesn't mention is how best to shape the loaf. You can of course have the loaf in any shape you desire. One thing I do suggest is that wherever you seal the dough together (make no mistake- there will be a seam somewhere), be sure to place that seam face side down on the tray or in the loaf tin. This way you can slash the bread with a super sharp knife/blade before it goes in the oven and you won't have any un-slightly cracks from seams, but lovely big slashes only where you want them to appear. I like lots, but 2 or 3 would be ample. Now what are you waiting for? Go on- get baking!