Tuesday, 14 May 2013

Pumpkin Pie

The pumpkins at this time of year are plentiful, cheap and deliciously sweet. For those of you who have experienced and been turned off by dry, fibrous, tasteless pumpkin in the past, I implore you to buy yourself a pumpkin today and give it another shot.
I bought a couple of butternut pumpkins at Coles for just $1/kilo recently, and let me tell you: they made the best pumpkin soup I have ever had. Of course, I devoured the entire vat before it even crossed my mind to take photos, so I decided to do something else with the pumpkin instead.

I have had pumpkin pie a few times before, but I have never really been won over by it. I've wanted to love it, but somehow it never hit the spot. I decided to take matters into my own hands and see once and for all if Pumpkin Pie could be delicious. After all, if any pumpkin could make a good pie, I was sure these could.

This pie has a delicate, buttery pastry, and the filling is softly set and aromatically spiced. While I admit that Pumpkin Pie is not my favourite dessert, I would willingly eat this version again. I ate it first cold, but found that I preferred it heated the next day with custard. Next time, perhaps, I will eat it warm from the oven rather than allow it to cool, as seems to be traditional.

Get in now while the pumpkins are still in season!

Prize winning pumpkins at the Sydney Royal Easter Show
Without a doubt, the largest pumpkin I have ever seen.

RECIPE- adapted from Lucy Bonnano's 'Pumpkin Pie' in Hands across the kitchen
Made 3x 9cm tarts

For the pastry

Ingredients:
1/2 cup plain flour
2 teaspoons icing sugar
50g butter
1 egg yolk
1-2 teaspoons iced water

Method:
Place flour, icing sugar and cubed butter into a food processor. Blitz until the mix resembles bread crumbs. With the motor running, add the yolk and then the water, little by little, until the mixture begins to come together. Stop the motor short of it's forming a ball.

Tip contents of processor onto a sheet of cling film  Use the cling film  not your hands- to press the dough into a disk, then rap up in the cling film and place in the fridge for 1/2 hour to rest.

Preheat oven to 200 degrees C. Remove dough from fridge and roll out on a floured surface till it is 3 mm thick. Use a bowl or circular cutter to mark out 13 cm circles on the dough, then use a knife to cut them out. Lift the pastry into the tart tins and use an off cut of pastry to coax the dough gently into the corners of the pan. Line all 3 then use a fork to prick the base before placing the tart tin back into the refrigerator until the oven is fully heated.

Once heated, remove the tin from the fridge. Scrunch up 3 pieces of baking paper until they become malleable,  then gently line the pastry tarts with them. Fill the lined tarts with dried rice, beans or baking beads, then blind bake in the oven for 15 minutes.

Once cool enough to handle, remove the tarts carefully from the tin and place on a wire rack to cool completely.

For the filling:

Ingredients:
125 g baked pumpkin flesh
1/2 teaspoon cinnamon
Pinch of salt
1/4 tsp ground ginger
small grating of fresh nutmeg
1 egg yolk
100mls cream

Method:

Puree pumpkin in the food processor until completely smooth. Add the remaining ingredients and blitz to combine into a smooth mixture. Fill cooled tart shells almost to the brim with the pumpkin custard mixture. Decorate with excess pastry.

Place tart shells onto a line baking tray and place into the oven. Reduce the temperature to 180 degrees C and bake for 15-20 minutes, or until no longer wobbly in the centre.

Serve warm or cold, as desired, with ice cream, cream or custard. Store pumpkin pie in fridge for freshness.


Wednesday, 16 January 2013

Strawberry Jam

Some time ago, Thomas Dux were selling strawberries for an incredibly low price: just $1 per 250g punnet. Ordinarily it just isn't viable to make your own jam, but when you get your fruit that cheaply, it only costs about $10 to make 4 jars- bargain. You'll find that about 8 punnets of fruit, or 2 kilos, is enough to make 4 jars. Obviously, you'll have to discard the greenery or any berries that are mouldy, so you'll end up with about 1.75 kilos, give or take.


Traditionally jam is made with equal parts of sugar and fruit. Personally, I find this combination a little too sweet. I opt for about 3 parts sugar to 4 parts fruit. If you can, use Jam sugar, as it contains a little pectin to help the jam set. Strawberries are not particularly high in pectin, so they need a helping hand. If you can't find jam sugar, add some Jam setta or pectin, according to the instructions on the packet.

Before you begin, sterilise your jars. I put the jars and lids through a dishwasher, then into a low oven to ensure they are completely dry. You can, instead, boil the jars for several minutes in a large pot, then remove to a tray and into the oven to dry. Be very careful not touch the inside of the jars or lids- you do not want to contaminate the jars after sterilising.


Wash your fruit well, drain thoroughly and put into a large pot with the sugar. If you like your jam chunky like me, then leave your fruit whole. If, on the other hand, you like a very pureed jam, chop your strawberries finely before adding to the sugar. Leave for a good half hour, stirring occasionally, to allow the strawberries to macerate and the sugar to dissolve. Put the pan on the heat and bring to a boil. Reduce to a simmer and, using a slotted spoon, remove the scum/impurities that appears on the surface, ensuring that the finished product is beautifully clear.


Stir the mixture occasionally and continue removing the scum from the surface until the jam reaches 105 degrees. At this point, remove a spoonful carefully from the pot onto a small plate. Leave the jam on the plate for a minute to cool, then run your finger through the centre to see if it has set. It shouldn't be runny, nor should it be solid: just a soft set jelly. The line you create with your finger should remain without the jam on either side oozing back into the centre. If it is still very runny, keep boiling and testing until it reaches a desirable consistency. The whole process may take up to half an hour, depending on the quantity of jam you are boiling. Immediately pour the jam into the sterilised jars- the heat will further ensure that the jar and the jam is free of bacteria. The jam and jars will be very hot- take care not to burn yourself. Using a tea towel, screw the lid carefully onto the jar. Leave the jam to cool thoroughly, then store in your pantry. They are ready for use as soon as the jam has cooled. The jam should keep for considerable time, so long as everything has been thoroughly sterilised. Enjoy with some fresh scones and double cream for a delectable afternoon tea. Bon appetit!


Wednesday, 9 January 2013

Girls weekend

Last weekend I played hostess to two of my dearest friends, Natalie and Amy: the very same ladies who coerced me into blogging again. They are personally responsible for taking all the photos that you see here, in hope, I believe, that if they did some of the work for me, I might go the extra mile and post the photos onto this blog. After their efforts, I feel obliged to at least post their photos of our marvelous weekend of food, movies and merry-making.


The fun began on Saturday afternoon with some cheese and spinach triangles, made with the spinach from our very small, but nonetheless precious, vegetable garden. Another day in the scorching sun and the spinach leaves, I fear, would have withered away, so their coming over was a perfect excuse to use them up. In addition to the spinach, which I steamed and then drained thoroughly, I added ricotta, fresh mint, lemon zest, parmesan, an egg, as well as a generous grinding of salt and pepper. I placed a mound of the filling onto several sheets of buttered filo and rolled, to the best of my ability, into triangles. Brush with egg wash or more melted butter, and then bake at 180 for 15-20 minutes until golden brown.


For dinner we had hamburgers with homemade brioche buns;  homemade pickled Jalapenos, red onions and cucumbers; ground beef patties (made from mince with 10-15% fat content); Gruyere cheese and a special sauce. When I was in New York in November, I had the most amazing burger at The National. It was called 'The Ugly Burger' on account of its turning into an ugly mess when eaten, but nothing about the taste, could be said to be ugly. It was so magnificent that I had to try and recreate it at home: this is my attempt. Although delicious, I'm afraid nothing will quite live up to my memory of the National 'Ugly burger'. If you are at all interested, you can find the recipe for the pickled vegetables and special sauce here.

I also served up a side order of Nigella's delicious Tuscan fries from her new book, Nigellissima. You can find the recipe for those here.


Now onto dessert. Again taking inspiration from Nigellissima, one of my newest culinary acquisitions, I opted for something cool and summery to end our evening: The Double Amaretto semifreddo. A semi-solid parfait, if you like, littered with shards of crunchy amaretti biscuits and enhanced with a dosh of Disaronno- that headily aromatic, almondy liquor, often referred to as Amaretto. I LOVE anything almondy: Marzipan, almond croissants, friands, Dr Pepper, Maraschino cherries. If it contains almond, I'm a taker. This dessert was, to my great delight, as intensely almondy as you can get. It was just as well that Nat and Amy both like Almond- or so they told me- because if you weren't a fan of Almond, you most certainly wouldn't like this dessert.

The only thing I would say against the recipe, is that there wasn't really much process involved. I suppose that's good if you are in a hurry or you don't really enjoy cooking; if, however, you are like me, it is a joy to spend a little more time pottering in the kitchen. I suppose, in truth, had I made the sauce to go along with it, there would have been a bit more to do, but anything that contains Apricot- apricot jam being a core ingredient in the semifreddo sauce- is of absolutely no interest to me. I just served mine with a little maple syrup and a scattering of a few more crushed amaretti biscuits instead. If you enjoy apricot, the by all means, make the sauce.

Before we knew it, it was Sunday morning and time for brekky. I had made enough brioche dough on Saturday to be able to make a small loaf in addition to the burger buns. What do you do with stale brioche? French toast of course. I cut the brioche into fairly thick chunks, so they did need quite a long time to soak. It is so vital that you take the time to soak the bread properly, as there is nothing worse than dry french toast. After soaking in a mixture of egs, cream, sugar and vanilla, cook at a low heat until golden and cooked through. I had some lovely ricotta left over from the triangles, so I sweetened that with maple syrup and added a little cinnamon and vanilla. I then macerated some strrawberries in some sugar and balsamic vinegar. To serve, I smeared some ricotta across the plate, sprinkled over some of the remaining amaretti, put the strawberries along side and the french toast on top with a mint leaf garnish. Serve with extra maple syrup, if desired. In my books, a little maple syrup is always desirable.


This post is dedicated to Nat and Amy! Thanks for sharing the weekend with me :)

Monday, 7 January 2013

Nigella's Chocolate Guinness Cake


Many, many months have elapsed since I last updated my blog, so long in fact that I had begun to doubt whether anyone would even remember that it exists. A recent discussion with two of my dearest friends, Natalie and Amy, assured me that it had not been forgotten and encouraged me to get the blog back up and running. Thanks girls for your support!


This cake was by no means a recent concoction. In fact, I made it all the way back in September for my brother, Andrew's birthday. It was seemingly a twist of fate that the cake I decided to make should contain the national drink of Ireland, Guinness,  and that his son, born that same day, be given the name of Patrick. When I began to make the cake, however, he was not yet named, so it was not intentional, I assure you. Instead, this cake was selected by Andrew's daughter Eloise, who insisted that Daddy wanted a beer cake. I was only too happy to oblige, and so made the only cake for which I was in possession of a recipe containing beer. 


This Guinness cake ended up being a real winner. It is incredibly moist and, because of the bitterness of the Guinness, not overly sweet. I am not a fan of either chocolate or beer, but I must admit I liked this cake; perhaps the combination of the two together counteracted the chocolatey-ness and beery-ness, leaving you with a pleasantly spiced, treacly cake, not unlike fruitcake, but without the fruit. Not only did it taste lovely but it was easy to prepare and looked remarkably like a pint of Guinness: a cloud of cream-cheese frosting floating atop the ebony cake base.

I encourage you all to give this recipe a go. The good news is, if you don't have the book Feast, you can find the recipe easily enough on Nigella's own website


Thursday, 30 August 2012

Banana Souffle and Instant Banana Ice cream

 Another day, another souffle- this time Banana. I admit I've gone a little souffle mad of late. But really, how can you blame me? They are delicious; they are, relative to other puddings, relatively healthy and you can make a souffle in almost any flavour you could possibly imagine. So far I've made apple and cinnamon, Rhubarb, raspberry, strawberry and banana. I don't plan on stopping there, either- think of all the other flavours I could make!

Ordinarily I would use the leftover egg yolks to make a creme anglaise (custard). With this particular flavour, however, I decided to try something different. Some time ago I saw Matt Preston make an instant Banana Ice cream and I've been waiting for the occasion to make it. Luckily I happened to have a freezer full of over-ripe bananas. All you do is peel the frozen bananas (One banana seems to make a generous scoop), chop them into chunks and blend in a food processor. You may have to stop the motor sporadically to scrape down the chunks towards the blades, but after a mere minute, you will have a most delicious, velvety textured banana ice cream. I even give you permission to let your guests
think that you slaved away for hours making custard
 and churning it by hand; it will be our little secret.


As for the souffle, the method is the same as for the preceding recipe, only substitute the strawberry for banana and the caster sugar for brown.

Bon appetit!

Wednesday, 8 August 2012

Strawberry Souffle


I'm afraid I've been terribly lax of late and haven't updated the blog in quite some time. I could blame it on the Olympics, on Masterchef All Stars, on any number of things really, but essentially I've just been too lazy to take the time to blog. Apologies!

Going back a few weeks ago now, I was at home by myself on evening and, cold and miserable from the wintery wind, decided to make myself some dessert. It can be a tricky task to find a dessert recipe that can be successfully divided to make one individual serving. Many recipes call for 1or 2 eggs for a dessert that feeds 6-8. Now tell me, how are you supposed to divide one egg by 6? With difficulty. So, with very little options to choose from, without having a week's supply of left-over pud, I decided to make a souffle- a dessert that I have found, to my great delight, divides exceedingly well. One egg white= one lovely serving.

Not only is souffle a suitable sweet for one, it is also incredibly delicious and, best of all, contains no fat. True , it does contain sugar and whatever it lacks in fat, I generally make up for by serving a big scoop of ice cream or a jug of custard alongside. I'd be quite content, however, eating one of these little babies unadorned.

Please don't be nervous about making souffle. You mustn't be nervous about egg whites-if you are, it will show in the finished result. Egg whites are really so much tougher than they are made out to be. So for an amazing winter treat for one or for many, try your hand at a souffle!


Strawberry Souffle recipe (one portion)

1/2 tablespoon melted butter for greasing
50g Strawberries (weight with greenery removed), quartered
30g Caster Sugar + 1 tablespoon more for dusting ramekin
1/2 teaspoon Cornflour, mixed into a paste with 1/2 teaspoon water
1 egg white

Preheat oven to 170 C

Grease a 250ml capacity ramekin with butter, then sprinkle generously with caster sugar, turning the ramekin around to coat the bottom and sides with an even layer of sugar. Tip out any excess and place rameking in the refrigerator while you get on with the souffle mix.

In a small saucepan place the strawberries and half the caster sugar over a low heat. Stir occasionally until sugar has dissolved and the strawberries are yielding. Remove from the heat and whisk in the corn flour. Using either a whizz stick, a blender or a processor, puree the strawberry mixture until smooth and completely free of any lumps. Set aside.

In a medium sized bowl, beat the egg white with a pinch of salt until light and foamy, then gradually add the remainder of the caster sugar, continuing to beat until thick (when you lift the beater out of the egg white, the peak should bend over slightly, although it should be thick enough that you can safely hold the bowl upside down over your head).

Add about a third of the egg white to the strawberry mixture, stirring the two together to combine. At this stage, you are only trying to loosen the strawberry mix, not retain air, so you don't have to fold. Place the remaining meringue mix into the strawberry and this time, fold the two together to combine, while retaining the air in the egg whites. You really need to spin the bowl around as you do this, so that you are gathering the  mixture from every corner of the bowl and incorporating it into the meringue. The best way is to use a metal spoon, drag it around the right rim of the bowl, scraping the base as you go, towards you, then flop, or fold, all that you have gathered back over into the centre of the bowl. Make sense? Then give the bowl a quarter turn and repeat until it is no longer streaky.

Remove the ramekin from the fridge and gently spoon the matter into the mould. Try not to disturb the buttery sugar coating you created earlier with your spoon. Spoon into the centre of the mould, coaxing it gently downwards and outwards. Fill right to the top and then, place a long spatula or butter knife midway across the ramekin and scrape towards you, allowing any excess the plunge over the rim. Repeat on other half and if necessary, back track to ensure a completely smooth surface, flush with the rim. With a bit of luck your spatula will catch the excess with every scrape. If not, clean the outside of the ramekin and then, using a clean finger, run your fingertip around the inside of the rim to create a small moat, if you will, between the souffle and the dish itself. Place souffle onto a tray and into the oven for 12-14 minutes. Do not open the door at all before 12 minutes- you don't want it to collapse.

Remove to awaiting plate and serve immediately with ice cream, custard or cream. I'm warning you- it will sink if you leave it lying about. I apologise for the lengthy, especially to those of you who have baked before. I merely wish to equip newbies with as much knowledge as possible to give them confidence in the kitchen. It can be a scary thing baking something for the first time, especially a souffle, so I hope these instructions will help you tackle the challenge with relative ease. If it doesn't turn out perfectly the first time, don't give up. Believe me- I've failed plenty of times. Practice makes perfect. If you don't know what went wrong, just ask and I'll do my best to point you in the right direction.

Bon Appetit!


Monday, 16 July 2012

Raspberry Red Velvet Cake


Red Velvet cake is one of my very favourite cakes. An ordinary buttermilk sponge is nothing special, but when you add food colouring to the batter, well, that's a different matter altogether. I mean, what's not to love about a whole bottle of rose pink food colouring?


I first discovered this cake about five years ago on the internet. Back then Red Velvet Cake was nowhere to be seen in Australian cake shops and was somewhat of a novelty. Ordinarily I cover the outside of the cake with the white cream cheese frosting, so you can imagine the surprise of cutting into a seemingly white cake for the first time to reveal a shockingly red interior.

 Nowadays you can find red velvet cake all over the place and consequently partakers are not overcome with the same wonder and awe as when they first gazed upon its crimson interior. Nonetheless, it remains one of my favourites and I make it whenever the opportunity presents itself.


The sponge itself is made with canola/vegetable oil instead of butter. This, in addition to the buttermilk makes for a very moist, tender crumb. The best thing is that the cake keeps extremely well and can be made several days in advance.

It is a lovely cake, served with a deliciously fluffy cream cheese frosting and makes a wonderful addition to any special celebration. Do try it!

Sunday, 1 July 2012

French toast with poached pears, maple syrup and roasted hazelnuts

Yesterday morning, I made myself french toast for breakfast. Lord knows that after the week of bad eating I've had (and by bad, I mean good, but unhealthy), I didn't need it, but I just had to have it. I just had to.

Anyway, you need no recipe for french toast, just a bit of common sense. If you like it sweet like me, add a tablespoon of sugar to a couple of eggs and some cream or milk. Then get your bread - I used some stale apple and cinnamon raisin toast, but you could use anything- and soak it really well. I mean really well- give it plenty of time to absorb what is essentially an uncooked custard. Don't attempt to do more than one slice of bread per egg. If you do, you'll find your french toast will be dry on the inside. What you want is a beautifully soft, custardy interior with a crisp outer shell. Also, cook it at a low heat. My pan got a bit too hot and  my french toast ended up rather dark. It was still delicious, but it would have looked much nicer had it been golden brown.


You can serve french toast however you like. Some like it savoury, in which case, omit the sugar and add a good pinch of salt at the start, plus more to serve. Here I have added some poached pears, which I heated in the pan after cooking the toast, a good slug of maple syrup and a scattering of delicious roasted hazelnuts,  that I blitzed in a food processor. Why not give french toast a try for a perfect lazy Sunday breakfast? It's quick, easy and every bit as delicious as pancakes.

Thursday, 28 June 2012

Gâteau aux noisettes et caramel


Ok, ok, I totally just made this name up. It was certainly not given this name in the cookbook, but rather a ridiculous name, 'Entremet Contemporain', that utterly fails to convey what kind of a cake this is. I could more simply have called it a hazelnut and caramel cake, but when one has a french inspired luncheon, one MUST give things french names. On Sunday I had a little, belated Birthday luncheon with a couple of friends and I made this cake, among other things, for my guests. In an ideal world, I would have taken photos of the twice baked Gruyère soufflé that I made for entrée, as well as the Fillet de Boeuf en Croûte we had pour le Plat Principal. Sadly, I was too busy running back and forth between the kitchen and the dining room to remember to take any photos of these at all.


So it is that you will have to be satisfied with the photos that I did take: those of the Gâteau aux noisettes et caramel. The cake is surrounded by a ring of sponge and its interior consists of a layer of caramel syrup soaked sponge, then caramel mousse, another layer of soaked sponge, hazelnut cream and finally a caramel glaze.


I'm not going to lie to you and pretend that it was all smooth sailing- no siree! The recipe in question comes from the Cordon Bleu book of desserts. The recipe is a bit of a shambles really. It seems that Cordon Bleu didn't correctly augment quantities for the home baker, leaving some components of the cake in quantities vast enough to produce 3 or 4 cakes, while other components were converted accurately and produced only enough mixture for one. 


Luckily, I'd seen enough recipes in my time to know that the specified quantities were wrong and altered the size of the batches accordingly. This entailed halving the cake mix, halving the caramel sauce, making the full batch of mousse, a half batch of cream and a full batch of glaze- CRAZY! 


Not only that, but there was a major error in the ingredients list for the mousse. The recipe specified 40g Gelatine, which seemed an insane amount, but I didn't question it for long enough to check the packet for directions. What I ended up with was a horrible, caramel glue that I could hardly remove from the saucepan, let alone fold into cream. A second batch turned out just right with about 2/3 sachet (roughly 1 1/2 tsps of gelatine). Boy did they get that quantity wrong!


Anyway, I shouldn't complain too much. Despite all these issues, the cake turned out rather well and cut beautifully. The highlight for me was definitely the hazelnut cream, which was, coincidentally, the simplest of all the components to make. It is seriously just cream whipped with a bit of icing sugar and some blitzed up roasted hazelnuts folded gently through. 


If you are brave enough to tackle this beautiful gateau after my horror story, just let me know and I will happily post the amended recipe on the blog. 


Bon appetit!


Wednesday, 6 June 2012

Marvelous Marshmallows


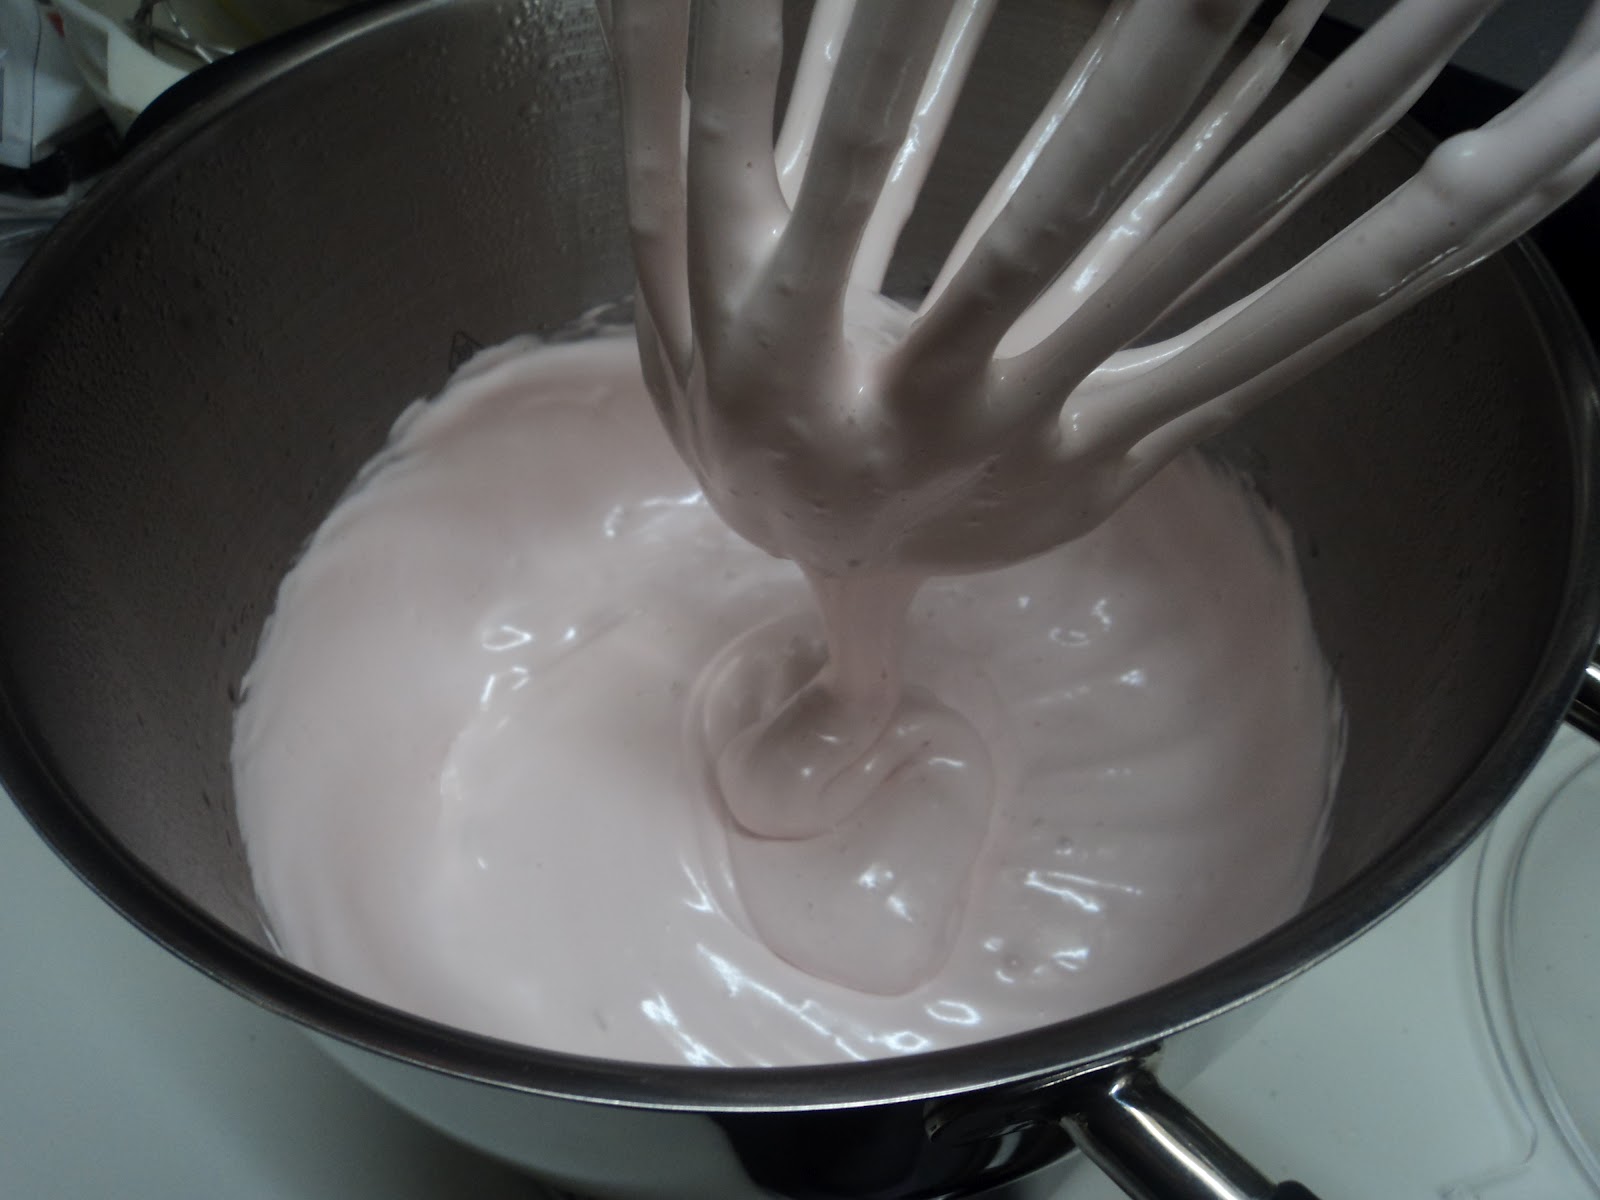
Hands up all those who have eaten home made marshmallows? Who has ever contemplating making them? It would seem to many to be a ludicrous idea, but they are in fact relatively easy ......... provided you have a stand mixer. If you don't, well, maybe it might be a little tricky. If you do, you are in for a real treat. My gosh they are good! Like unbelievably, positively, absolutely fantastic!!! They really do put your store bought marshmallows to shame.


A few weeks ago I was watching Hugh Fearnley-Whittingstall make his own Marshmallows on the River Cottage: Autumn. I was struck immediately by how quick they were to whip up and, even more amazingly, how rapidly they set. I really thought marshmallow would have to set over night, or for the equivalent amount of time. Of course, Hugh, being the good, all natural, back to basics kind of a guy that he is, used Beetroot to colour the marshmallows pink. I didn't have any beetroot on hand, nor did I have the slightest inclination to use a vegetable to colour my food. As far as I'm concerned, a drop of food colouring won't hurt at all. 


The recipe is available here from the BBC site. I urge you all to give them a go. If like me, you are short of beetroot, just put in a few drops of pink colouring into the 125 mls of boiling water before adding the gelatine. You won't believe how far your two egg whites willgo- you will end up with a huge batch of the lightest, most delicious Marshmallows you've ever tasted: perfect with hot chocolate or toasted over a fire. Enjoy!

Sunday, 27 May 2012

Haupia cake


I have been fortunate enough to have spent quite a bit of time in Hawaii over the years and on one of my more recent visits, I was introduced to a delightful Hawaiian specialty- the Haupia cake. Haupia is a cold, jelly like coconut pudding, and this, the cake version, is a layered dessert of meltingly tender sponge and fantastically wobbly Haupia. My first taste of this cake was during a girl's trip to Honolulu with my mother and sister, Rachael. Rach took a particular fancy to this coconut creation and insisted upon ordering it at every establishment with Haupia cake gracing its dessert menu.


On the occasion of Rachael's Birthday, this past week, I was stuck for ideas on which cake to make her, when I suddenly remembered her fondness for the Haupia cake. I went searching online and came across a recipe by renowned Hawaiian chef, Roy Yamaguchi of Roy's Restaurant. I'm generally not too keen sourcing recipes online without knowing the reputation of the author. I felt assured, though, in this case, that the recipe would be a good one, because I have heard nothing but positive reviews of Roy's Restaurant. You may even recall an episode of the Family Jewels, in which Gene takes his wife, whoops, I mean girlfriend, to Roy's; they liked the food so much that he went and chased down Roy to make a private dinner for the two of them the following evening.


The recipe, as expected, worked a treat. It is really one of the most interesting cakes you'll ever have. I would say, in terms of texture, that it is more like a trifle than a cake, with its lovely mellow coconut jelly and moist sponge. By the way, if you've never before seen candles in jelly, it is a sight to behold. My how they jiggled about as I carried the cake to the table! The most important thing of all was that Rach was thrilled with her birthday cake, which was, after all, the whole purpose of its being made.

Thursday, 24 May 2012

Cinnamon Buns for Mumsy Daisy


Cinnamon buns are a true favourite of my mother's. She is not the kind of person with a really sweet tooth, in fact she rarely orders desserts. Cinnamon buns, however, she can devour by the dozen. I decided to make her a batch for mother's day and, to shake things up a bit, I added some mashed bananas to half of these lusciously sticky, oozy, gooey buns. I'm not going to lie to you, I too adore these buns. It is hard to convey in words and pictures just how moreish they are, not least because, as the italians would say, they are brutti, ma buoni (ugly, but good). To fully comprehend, one must encounter the buns when they are fresh from the oven, their heavenly spiced scent permeating through the corridors and into every  nook and cranny of the house, and their sticky cinnamon centres oozing from each and every crevice of these wonderful buns. Because the word 'enough' doesn't exist in my vocabulary, I top it off with a cream cheese drizzle for good measure.


The recipe I use is based on Nigella's 'Norwegian cinnamon buns' from How to Be a Domestic Goddess, a wonderful book that I can't recommend highly enough. It has been a long time since I made these following the recipe to a tee, having tinkered with them substantially over the years to create my own recipe. I'm not yet ready to share mine, I'm afraid; cinnamon buns are, you see, one of MY things. I wouldn't want anyone to take over now, would I? Maybe one day when I'm feeling more generous and not too lazy to type it up, I may consider sharing with you, my privy counsel. Until that day, try Nigella's recipe and play around- you may come up with something even better. 

Wednesday, 16 May 2012

Banana nut muffins


In Honolulu, there's a fabulous little place that sells my favourite muffins in the whole wide world. It is a small, unassuming takeaway joint in the Ala Moana food court called 'The Paradise cafe' and its muffins are out of this world. The banana nut muffin is my particular favourite: a golden, crunchy muffin top with a fragrant, moist and oaty interior. Ever since I first tasted it, some 6 or so years ago, I have made it one of my life's greatest ambitions to replicate the magnificent banana nut muffin of 'The Paradise Cafe'.


This muffin was the closest I've ever come to the perfection of 'The Paradise cafe': close, but not quite. I'm seriously contemplating just asking for the recipe next time I'm in Hawaii just to get me through to the next visit. Honestly- I'm sick of these dry, cakey things that vendors are calling muffins these days. I'm also equally unimpressed by homemade muffins sans crunchy top- don't be afraid, people, to fill 'em up right to the top, even a little over, to get a wonderfully crunchy muffin top.

Ingredients


200g Wholemeal spelt flour (my preference, but you can use ordinary plain flour too)
100g rolled oats, coarsely ground, or oat bran
2 tsp Baking powder
2 tsp Cinnamon
125g Brown sugar + 2 tablespoons for the topping
2 eggs
1/2 cup maple syrup
80ml natural yoghurt
100ml vegetable/canola oil
4 bananas, mashed
50g macadamias, coarsely chopped

Method


Preheat oven to 200 degrees celcius.

In a large bowl, stir together all the dry ingredients, except for the macadamias and reserved additional sugar for topping. Make a well in the centre. In a smaller bowl, whisk together the wet ingredients until amalgamated. Pour this into the well in the centre of the dry ingredients. Mix gently a few times, just enough to mix the wet into the dry so that there are no huge patches of flour remaining. DO NOT STIR MORE THAN THIS. A light muffin is made from a lumpy batter, so don't be tempted to whisk or you'll end up with dense muffins.

Place muffin papers into a 12 muffin pan. Delicately scoop the muffin batter all the way to the top in the awaiting muffin papers. If it looks as though you won't have enough batter for 12, though you should, it is better to have fewer muffins filled up properly. In a little bowl, mix together the reserved sugar and macadamias. Sprinkle evenly over the top of the muffins.

Place tray in preheated oven and bake for 20-25 minutes. I know it seems a long time for a muffin, but these are rather large. Still, be sure to check yours after 15 minutes and then at five minute increments- ovens vary enormously in temperature.

Once manageable, remove muffins from pan and leave on a cooling rack. They will keep for several days in an airtight container, although I warn you that they are never as good on days 2 or 3. The muffins are so moist, you see, that putting them into a container rather destroys the wonderful crunchiness of their tops. If you have time, put the day old muffins back into the oven for 5 minutes or so to revive their texture.

Monday, 14 May 2012

White vienna loaf

 Enjoying a freshly baked loaf of bread is one of the simplest and greatest pleasures of life. Indeed there is nothing remotely exotic about a loaf of plain white bread, nor is there any great challenge in its preparation; there is, nonetheless, a certain pride that can be attained only from baking with yeast. A cake comes to life only when it is consumed by the heat of the oven. Bread, on the other hand, comes to life before your very eyes on the kitchen bench. The dough, nurtured by the gentle touch of your hands and guarded carefully by your watchful eyes, miraculously grows, doubling in volume. It is the closest thing, I can only imagine, to raising a child; the only difference being that we tend not to eat our children once they are grown. 


This recipe is 'The essential white loaf' from Nigella Lawson's How to be a domestic goddess. Nigella suggests using potato water for its excellent starchy properties. I, however, didn't have any potato water on hand, so I substituted some similarly starchy pasta water and reduced the quantity of salt to 2 teaspoons. It has a lovely crumb and the ratios seemed to be spot on.

One thing Nigella doesn't mention is how best to shape the loaf. You can of course have the loaf in any shape you desire. One thing I do suggest is that wherever you seal the dough together (make no mistake- there will be a seam somewhere), be sure to place that seam face side down on the tray or in the loaf tin. This way you can slash the bread with a super sharp knife/blade before it goes in the oven and you won't have any un-slightly cracks from seams, but lovely big slashes only where you want them to appear. I like lots, but 2 or 3 would be ample. Now what are you waiting for? Go on- get baking!